If you watch my YouTube channel, then you’ll have already seen some quick reviews about my May 2015 Favorites, but I’ll be going more in depth with the products and my thoughts in this post. If you haven’t seen my YouTube video yet, head on over and check it out and if you like it, subscribe and give me a thumbs up!
I kind of went crazy and bought hundreds of dollars worth of makeup last month, so it was a little difficult to narrow it down to a handful of items so I wasn’t inundating you with the longest favorites post ever in the history of time. I will say I was EXTREMELY happy with almost all the products I purchased, which is always a great feeling, but these items really stuck out for me.
dermalogica gentle cream exfoliant ($41)
I know I mentioned this in my April favorites post last month, but having used it now even longer (and the key to knowing whether skincare is any good is by putting in the time), I can really back up my original review with a HUGE thumbs up. This exfoliant, despite its awful scent, is the real deal when it comes to great skincare. I use it once a week and love the results whenever I do. I’ve been having some major skin issues/breakouts lately (why!?) but in spite of that, I can see how well this works and how lovely it makes my skin (under the circumstances).
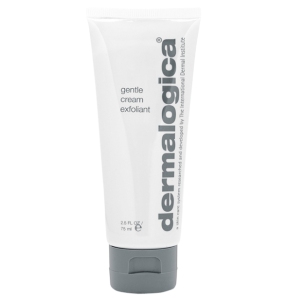
Photo courtesy dermalogica.com
hey honey Good Morning honey silk facial serum ($41)
I have never ever loved a skincare product MORE than this one. Even though I’ve suffered adult onset acne for the past twelve years, I haven’t been very fastidious about skincare outside of acne treatment. I think most of that was because I was worried that piling too many products on my skin would make it worse, and I didn’t know all the different types of skincare that were available, and I mistakenly thought that my Asian genetics meant I wouldn’t ever age, and I wouldn’t ever have to use preventative skincare.
I wish I could sit 25 year old Mary down and give her a stern talking to.
This serum is an extremely nourishing treatment made with honey. It not only replenishes and protects your skin under your makeup but also has ingredients that moisturize, smooth, and improve your skin tone. Even though I have years of acne scarring, the rest of my skin has become so nourished and luminous that I find myself actually liking my skin. I didn’t think I’d ever be able to say that! A very little goes a long way (one pump every morning), and it smells really amazing. I’m addicted!
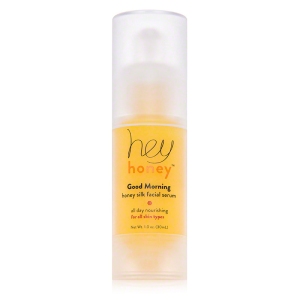
Photo courtesy heyhoney.com
Morphe Brushes Flawless Collection ($3.99-$12.99)
I’ll be totally honest, my first impression of these brushes, when I opened the package, was that of major disappointment. They didn’t feel as soft as I was expecting, and I wondered if they would actually perform as well as everyone says. I purchased M500, M501, M504, M509, and M510, the first three for myself and the last two for my client kit.
I’m eating my words at this point. These brushes are really incredible. The blend I get whenever I use them (which is on the daily) is the type of blend I used to only get by running my pictures through skin softening apps or airbrushing them. Their unique, tapered point makes for a, well, flawless finish. There aren’t any rules to how you can use the brushes, so you will notice other MUAs using certain styles in completely different ways than me, but I use the M500 for blush, M501 for my contour, M504 for highlight, and then the M509 for client contour and the M510 for client eyeshadow blending. I want to own the entire collection and use them almost exclusively in my client kit. I’m EXTREMELY happy with them! Plus they’re quite reasonably priced — when the most expensive brush in a line is less than $15, then you’ve run into one heck of a deal. There are 17 brushes in the entire line, black and white, of all differing sizes and densities.

Photo courtesy instagram.com/morphebrushes
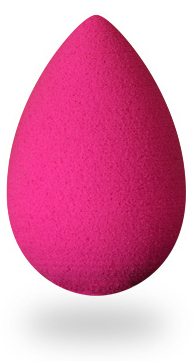
Real Techniques Miracle Complexion Sponge ($6)
If you’ve been following my blog or Instagram account, you know how in love I am with my Beauty Blender original. It changed the way I applied foundation and concealer and always delivers a flawless but full coverage finish. I balked at the price at first because I couldn’t fathom a sponge being worth $20, but I’m on my second sponge now, so that’s that. I’ve tried a few dupes and watched/read reviews of others, and I wasn’t find anything that came even close. (The Target dupe was super hard, even when wet, didn’t have any bounce, and smelled like rubber tires.) I’ve seen the Real Techniques sponge being used in a lot of YouTube tutorial videos by some pretty big name MUAs, however, and thought I might as well give it a try. At only $6 (or $10.99 for a two-pack at Ulta), I figured I wouldn’t be out too much money if it was awful.
Shape, size, and color aside, this is the Beauty Blender. Seriously. I’ve read reviews by people insisting that the Beauty Blender is just a little softer, a little squeezier, a little bouncier, but I’ve used both interchangeably and have found no difference in any area, especially when it comes to the finish of my makeup. And I actually prefer the shape and size of the Real Techniques version — it’s bigger and has a nice flat edge that is PERFECT for the under eye area, forehead, and chin. I plan on stocking up and having them in my storage at all times, both personal and client kits. Seriously awesome. I’ll keep you posted as to whether it lasts as long as the original Beauty Blender (around a year), but so far it seems to be a little more durable, too.
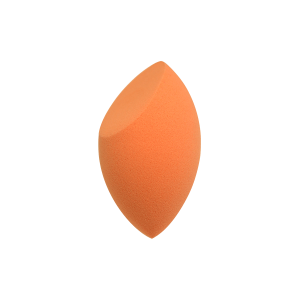
Photo copyright realtechniques.com
Pixi by Petra Flawless Beauty Primer ($22)
Since I JUST wrote about this primer and why I love it, I’ll just send you over to that post.
L.A. Girl Cosmetics HD Pro Conceal yellow corrector ($2.99-$5)
After purchasing the Wet n Wild Coverall color correcting wheel and being pretty disappointed with the results (really thick, cakey product, not much coverage, although the green isn’t too bad on acne), I was skeptical as to whether another drugstore corrector could be decent. It can! The L.A. Girl Cosmetics Pro Conceal comes in SEVERAL shades you can use for highlight/contour, and then three correcting shades. It’s a lightweight, full coverage formula, and I have noticed a decrease in visible dark circles under my makeup. I apply it after primer and before my foundation, just on those undereye circles, and I look a lot less tired and my eyes look brighter. Does it cover them 100%? No. I believe the formulation would need to be thicker for that to be the case, but then you’d also run into mega cakiness, so it’s kind of a catch-22. I feel that, for just a few bucks, it works effectively enough without leaving a cakey mess on my face, and I plan on keeping it in my collection because you hit your 30s and then dark circles are a way of life.
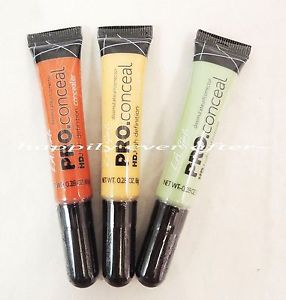
Photo courtesy ebay.com
Maybelline Instant Age Rewind Eraser Dark Circles Treatment ($6.99-$8.99)
If Desi Perkins likes it, then I want to like it. That’s not entirely true, but it’s mostly true, and when she started using it in her tutorials and raving about it, I wanted to get my grubby little mitts on it to see what the hype was. I use NARS Radiant Creamy Concealer on a regular basis and had been using it for my highlight, but the problem I was running into was a real texture change/deterioration as the day wore on because my skin is so oily. Even when I skipped foundation in those areas and only used the concealer, it was still getting a little nasty (especially on my chin and nose). This doesn’t mean I won’t keep buying it — I love that concealer for blemishes — but I needed something a little less thick and manageable. The upside to the Maybelline is its formulation — just thin enough to be EXTREMELY blendable but still thick enough to provide decent coverage. I do still feel like I need to use my yellow corrector underneath, but this just adds an additional brightness. I also use it on my forehead, down my nose, and on my chin. I mentioned in my video about my disappointment over the shade options, particular for those who are any fairer skinned than me, but in looking on the Maybelline website, I notice there’s a Brightening shade, which appears to be much lighter than the one I’m currently using (Fair). I need to try that one out asap, and I imagine it will take care of all the issues I currently have with the product.

Photo courtesy maybelline.com
Milani Cosmetics Baked Blush in Bellissimo Bronze ($8.49)
When I first went to the Milani Cosmetics website to purchase a baked blush, I was planning on buying Luminoso because Nikkie Tutorials uses it, and as we’ve already established several times, I want to be more like her. It was sadly out of stock, so I’ll need to try again later, so I looked through all the shade options and decided on Bellissimo Bronze because I’ve been wanting a shimmery bronzer for summer. Of the six contour palettes I own, all of the bronzers are matte, which is preferable for contour, but I wanted something that would give me a warmth and a glow. Bellissimo Bronze is SO pretty. It’s a very shimmery product without being too shimmery or glittery, and the color payoff is incredible. It blends really beautifully, and I love to apply it over my contour on my cheeks and temples to look like I’ve just come back from a great vacation somewhere exotic. It is, however, rather warm, so if you’re a cool toned individual or any lighter than me, you’ll want to avoid it because it could make you look really orangey. I really love the formulation of these baked blushes, and I want to build my collection with more of them. Even if you don’t purchase the bronze shade, you’d end up really happy with another shade.
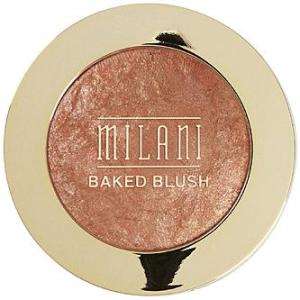
Photo courtesy kmart.com
City Color Cosmetics Be Matte Blush ($5)
City Color Cosmetics has become my new brand obsession. I want to try pretty much all their products (though I really shy away from purchasing items like foundation online because the color matching is impossible to do and you could end up with something really off). They’re a cruelty-free company, and their pricing is just ridiculous for the quality you’re getting. These Be Matte Blushes are super velvety soft, with great pigmentation and near perfect blendability, and I am only four away from owning the entire collection. Some of the shades aren’t even right for my skintone. I don’t even care. I want them all. I honestly have NOTHING negative to say about them at all — if you want shimmer, you can top them with something more shimmery (I like to layer NARS blush in Reckless over the City Color Cosmetics Dragonfruit), but the matte option is really lovely. These are, hands down, the best blushes I’ve ever used, and that includes high-end prestige brands. You have to check these babies out.
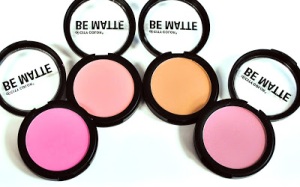
Photo courtesy citycolorcosmetics.blogspot.com
City Color Cosmetics Contour & Define ($11.99)
I mentioned this palette in my City Color Cosmetics Haul video along with the Be Matte Blushes, and my first impression was pretty favorable. Since then, I’ve used it nearly every day (though I’ve put it aside for a few days because I recently purchased the LORAC Contour palette (to be released June 14th — yeah, I got it early). I can really see myself using a bit from each palette for the perfect definition and glow, however. One of the least expensive contour palettes out there, the City Color one packs a real punch. It does have the fewest number of color options, with one contour, one bronzer, one blush, and one highlight, but the pans are quite sizable, and that makes it a perfect choice for those interested in doing a little highlight and contour on a regular basis without being overwhelmed with too many shade options. This palette does run a little warm, as is the case with MANY contour palettes, so if you need a cool-toned contour, you’ll unfortunately need to skip this one (I really hope they release a cool-toned option because that would be amazing). The texture/formulation is almost identical to their Be Matte Blushes, velvety smooth and very blendable. The bronzer appears to be pretty light, but don’t let it fool you — you’ll get a gorgeous, natural warmth when you use it (I use it along my temples and jawline, leaving the contour powder to chisel out my cheeks). The blush is a lovely neutral color (very similar to their Be Matte shade Papaya, but not identical), but the real MVP of this palette is the highlight. I would, without question, pay $12 for it alone. It’s a cross between a satin and matte finish, and the natural glow you get from it is stunning. This isn’t going to be like BECCA Cosmetics Opal or Moonstone or TheBalm’s Mary Lou-Manizer, super shimmery and a statement highlight, but it’s not going to be lost on your skin either. It’s become my go-to highlight, even for my cheekbones, and it looks like I’m glowing from within rather than packing on product to achieve that appearance. I’m pretty certain I’ll hit pan on that first.
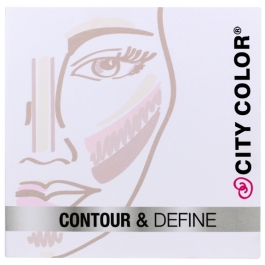
Photo courtesy citycolorcosmetics.com
Marc Jacobs Beauty Highliner Gel Crayon in Blacquer ($25)
APOLOGIES for mentioning in my video that I thought this retailed for $17 at Sephora because it is, in fact, $25, making it a little more expensive than the Urban Decay 24/7 Glide-on Pencil. Because of the incredible quality of this pencil, however, and its perfect formulation, longevity, creaminess, pigmentation, etc., I still feel that’s a reasonable price (especially considering I only use it to tightline, so it will last me forever).
I feel pretty strongly that pencil liner is only good for tightlining and nothing else because you can never get a precise enough point to actually wing it, so that’s how I use this one. This is honestly the best pencil liner I’ve EVER used. Where every other pencil liner I’ve tried (waterproof and smudgeproof, based on their claims) has worn off in the waterline (and I get it, I do — the waterline is named as such because it’s kind of wet), the Marc Jacobs Highliner stays put for several hours. It will wear off a tiny bit, especially if I’ve been crying or have experienced allergy-based watery eyes, but it can run circles around all the eyeliner pencils. It’s self-sharpening, so you don’t end up wasting a lot of product sharpening it all the time, and the packaging is beautiful and sleek. It comes in 25 beautiful, pigmented shades, so there’s something for everyone. I honestly love this so much, and for a limited time, if you enter the code JUNE when shopping on the Marc Jacobs Beauty website, you’ll receive two mini Highliner pencils free with any purchase $50+. Which means you could buy two Highliner pencils and receive two minis (which are quite sizable) for a total of $50. Pretty solid bargain if you ask me.
Photo courtesy marcjacobsbeauty.com
PHEW this was the longest post ever, but hopefully you enjoyed it and found it helpful! Tell me about your May favorites — anything I need to try out this month???